Showing posts with label Chocolate. Show all posts

Tuesday, November 1, 2011

Chocolate Pear Custard Tart

First, I must confess that I forgot to take a picture of the finished tart in all of its prettiness.  Fail.  I mentioned on the clam chowder post that we were having our friends Eric and Julie over for her birthday and I asked her what her favorite dessert was.  She mentioned custards.  So I did a little searching and came up with this.  

Chocolate Pear Custard Tart
What you'll need: 

Crust
1 Stick plus 2 tablespoons unsalted butter, room temperature
1/2 cup sugar
2 eggs
2 cups flour
1 teaspoon salt

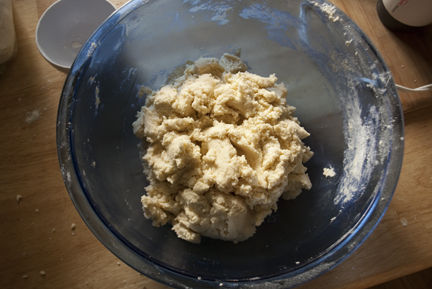
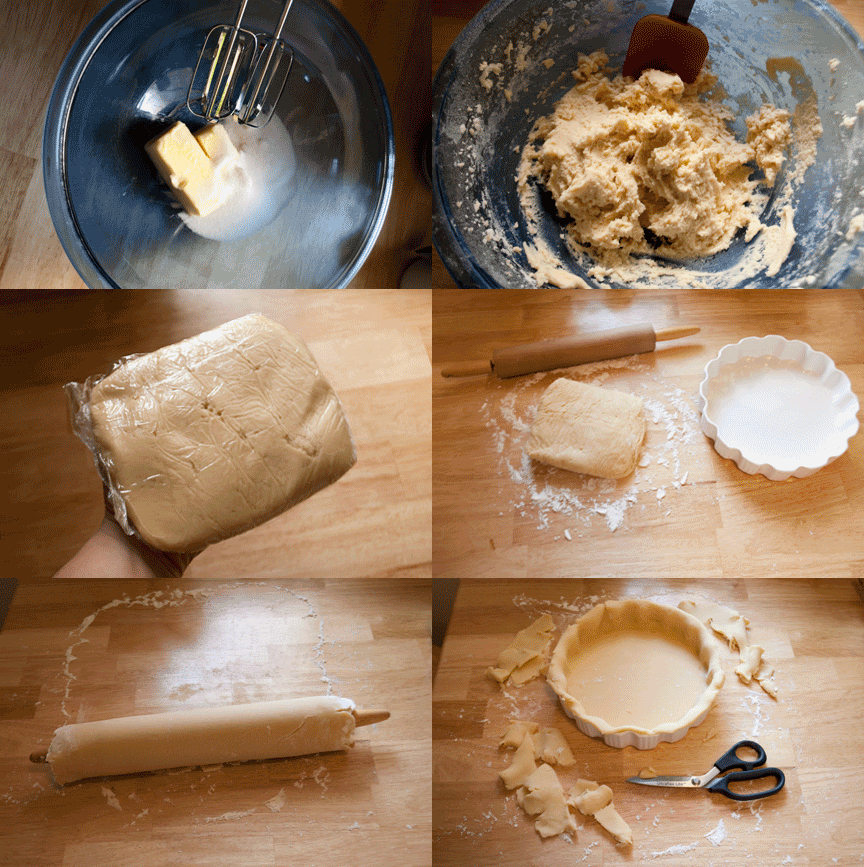
Cream butter and sugar.  Add egg.  Mix in salt and flour.  Scrape dough onto a large piece of plastic wrap and shape into a disk.  Refrigerate anywhere from one hour to over night. Remove from fridge and place on floured surface. Roll out to 1/4 inch. Place dough into tart pan and gently press down to form the sides of the pan.  Cut off excess. Return to fridge for one hour.


Pie Filling
2/3 cups chopped dark chocolate
2 pears peeled and sliced 1/4 inch thick
1/2 cup ground almonds (I used slivered almonds and pulsed them in the food processor until fine)
1/2 cup plus 2 tablespoons sugar
2 eggs (divided)
3/4 cup whipping cream
2 teaspoons pure vanilla (divided)

Once pie crust is formed into pan and chilled, evenly sprinkle chocolate over bottom.
Preheat oven to 400. In food processor or using a hand mixer on high, blend one egg, one teaspoon vanilla, 1/2 cup sugar and ground almonds until smooth. Evenly pour over chocolate.  Now evenly layer the pears.  In a small bowl, whisk together one egg, one teaspoon vanilla and the whipping cream.  Pour over pears.  Sprinkle top with remaining 2 tablespoons sugar. Bake for 10 minutes at 400 then reduce heat to 350 and bake for 45 minutes or until crust and top is golden and custard is set.  Allow to cool completely before serving.  Store leftovers in fridge.


This was really delicious.  Not too sweet, rich, creamy and great texture.  Oh man, I'm kind of sad we ate the last pieces last night.  I have already planned my next version of this tart that I think I will make for Thanksgiving. In the mean time, enjoy!

Tuesday, October 18, 2011

Cake Pops without Sticks Revisited!


It is time to revisit the cake pop.  I have made literally hundreds of these since my first attempt.  They were one of the deserts that I made for our wedding.  After about the 5th or 6th cake I started to experiment a little more with flavors.  The coffee one was my biggest success.  I also found an easier way of dipping them in the chocolate with out having the sucker stick, so I thought that would be a good tip to share.  My original cake pop post is by far my most visited post to date, so time to out due myself.


Supreme Coffee Cake Pops (without sticks)
What you'll need:
1 chocolate cake mix
1/2 container chocolate frosting
2 tablespoons freeze dried coffee
1 teaspoon water
chocolate melting chocolate (if I had to guess, I'd say 4 cups but be sure and have extra.)
chocolate covered coffee beans for garnish (you could use slivered almonds or anything here)

You can make homemade cake or frosting if you'd like.  I'm just being lazy, and I'm not sure it would make a huge difference.

Bake cake according to directions.  Once tooth pick comes out clean, allow to cool then use a fork and crumble until there is no more chunks.  Place frosting in a microwave safe dish and heat for 20 seconds.  Mix freeze dried coffee with water to dissolve, add to warm frosting and combine.  Now pour frosting into cake and mix until evenly distributed and cake is now just one big dense ball.  Shape into golf ball sized balls.  Set aside.

Heat chocolate either in a double boiler or microwave, your choice.  The double boiler is safer, chocolate will burn in microwave quicker. Here is the new tip, take a chop stick and stick half way into ball then use the stick to dip into chocolate.  Set the ball into the chocolate on one end then pull through, then turn half a turn and do again until the ball is covered.  Gently bob to remove excess chocolate, then place onto wax paper and lightly twist remove stick.  Now place a chocolate covered coffee bean over the hole in the top where stick was.  Done.  Allow to cool.  You can place in freezer to speed up the process, just be sure to not to freeze.


I ran out of wax paper so I covered my pizza stone with cling wrap.  Make due with what ya got!


If you don't want that many cake balls laying around, you can freeze them before you dip them in chocolate.  Then when you are ready to dip, take them out the night before and let the return to room temperature.  They will be perfect.  Just don't freeze after you have dipped them.  Now share with everyone you know.  Enjoy!

by the way...if you are unsure of where to buy the sticks and thats why you want to skip that step, Michaels sells them for a good price in their cake decorating section.

Tuesday, October 11, 2011

Sweet and Spicy Bran Muffins


Sweet and Spicy Bran Muffins
Change is in the air.  Fall weather is here, changing relationships, new and evolving hobbies. I'm sure other people are experiencing changes in their lives different than mine.  2012 is just around the corner now, and I hope everyone is begining to look forward to the new year approaching.

I love this time of year.  When the leaves are just changing, Halloween, birthdays, Thanksgiving, birthdays, lots of birthdays, Christmas and my ever favorite...New Years!!  The next 3 months are such a whirl wind for me that this is the time that I start to look forward to the next coming year and what it will bring.  The older I get, the more I find myself looking forward to next year and what changes my life will under go different from the last.  I can specifically remember the year that I began to look forward to the next, now its just a part of my mind wondering fall thoughts.

I'm sure you've noticed some minor new things about dgydd (don't get your dress dirty) and there will be more to come as I get more organized.  I wanted to add a little more structure and variety to my blog, I found myself getting bored and uninspired lately, so I decided to take a little break and think about the progress this blog has made over the last 9 months.  Initially I had planned to wait until dgydd's first birthday to start with my new plan, but I'm ready now.  That way the kinks will be out and it will be easy flowing for the new year.  At first I thought I would explain my ideas of new things that will be added, and then go for it...but I think I'm just going to let it flow and keep it more random.  Not a real big deal in the scheme of the world and won't really affect anyones lives or anything, but I'm kind of excited about it.  So stay tuned.  And thank you to everyone that checks in on a routine basis.  I'm glad there are a few people out there that enjoy this hobby of mine.

So, lets talk about these muffins.  Don't let the "spicy" throw you off.  I have made these muffins about 10 times now and only once did they really have a spice to them.  You may get a little twinge of spice for a split second, but its nothing that is going to heat your mouth up and stay for a while.  Ancho chilies are such a mild chili that they really only give the bran muffin a rich taste that complements the chocolate and heartiness of the bran.  I kind of forgot about these muffins, I'm really glad my memory didn't fail to remind me of these tasty snacks.

What you'll need:
3 cups crushed bran flakes
2 1/2 cups flour
1 pack or about 5 ancho chilies (you can find them in the mexican section of most grocery stores)
1/2 cup apple sauce
1 teaspoon salt
1 tablespoon baking soda
3/4 cups honey
5 cups water (3 cups will be to boil ancho chilies in)
1/2 cup plain greek yogurt
2 eggs
1-2 cup mini chocolate chips
1/4 cup sugar
1 tablespoon cinnamon


In a medium pot, add ancho chilies and cover with about 3 cups water.  Bring to a boil then reduce to a simmer and steep chilies for 15 minutes flipping them over half way.  Reserve 2-3 chilies and 1 cup of the water.


Preheat oven to 350. In a medium bowl, add bran flakes and set aside until chili tea is done.  Once chilies finished steeping, pour one cup of the chili water and apples sauce over flakes and mix until a thick paste forms and you can no longer make out the flakes.  Set aside.


In a large bowl, sift together flour, cinnamon, sugar, baking soda and salt.  Add eggs, water, yogurt and honey and mix until no longer lumpy.  Add bran paste and mix until fairly smooth, some lumps are ok.  Take the two or three chilies you saved, split them in half and remove seeds, then either chop them in a food processor or by hand into small bits.  Fold in chocolate chips and chilies into muffin batter.


Spray muffin tins with cooking spray, you can use muffin papers if you choose, I didn't.  Fill each cup 3/4 of the way full and bake for 15 minutes or until a toothpick comes out clean.  Let cool for a few minutes before removing from pan.  You will probably have to run a butter knife around the edges, but they still come out easy. 


If you want something different than the typical fall pumpkin/apple fall overload, give these a try.  You could probably even add a little all spice to keep them on the same fall flavor flow.  I love them.  Enjoy!

Sunday, June 19, 2011

Samoa Cookies


These cookies we're eaten by a lot of people.  At least 10 different people had a go at them, and 10 people were wonderfully satisfied by their sweet, nutty, chocolaty, buttery, chewy goodness.  They were my Father's Day present for my dad and Kam's dad Larry.  I tried to think of a cookie that my dad loves and the Samoa Girls Scout cookies popped into my head.  Those were always his favorite when cookie selling time rolled around each year.  Yes I was a girl scout (and a brownie and daisy too).  So anyways, these suckers are delicious and time consuming, but so worth every minute.

What you'll need:

(I doubled my recipe, pictures will show doubled amounts)

For the cookie:
2 cups flour
1 cup butter (2 sticks) softened
1/2 cup sugar
1/4 teaspoon baking powder
1/2 teaspoon salt
1/2 teaspoon vanilla
1 tablespoon milk

Cream butter and sugar. Add vanilla and milk.  Mix in flour.  Take one large piece of wax paper and drop dough in center.  Going the long way, roll dough into a long tube about 14" long or about 2.5 inches thick.  Place in freezer for about an hour.  

Once cold preheat oven to 350.  Remove from freezer and slice into 1/4 inch thick cookies.  Bake on wax paper or I put tin foil over my cookie sheet and sprayed with a little cooking spray.  Bake 10-12 minutes or until bottoms are golden brown.  Tops won't brown.  Remove from cookie sheet and allow to cool.  They don't need too much space between each cookie, they don't spread too much.

Topping:
3 cups sweetened shredded coconut
1 bag or 14 oz chewy caramels
1/4 teaspoon salt
3 tablespoons milk
1 1/2 cups dark chocolate (I used special dark chips)

Preheat oven to 300.  Evenly spread coconut on a cookie sheet with an edge.  Toast coconut, checking and tossing every 3 or 4 minutes until lightly browned. Remove from oven and let cool. Unwrap caramels.  Place caramels, milk and salt in a medium non stick pan. Heat over medium low, stirring once begins to melt fairly constantly until smooth.  Fold in coconut until everything is well coated.  Make sure you get all the caramel off the bottom.

By this time your cookie should be cooked.  Using a spoon, drop around 2 tablespoons of the coconut onto each cookie pressing down into the cookie as much as you can.  This part is a little difficult because of how sticky the coconut and carmel is.  As it cools it will sink and stick to the cookie more.

Once finished with coconut, heat 1 cup chocolate in the microwave in a pie plate or rimmed dish for 30 seconds at a time, stirring between until very melted.  Take each cookie and dip bottoms into chocolate.  I used a butter knife to slide under cookie to lift back up.  If you pull on the coconut it will pop off.  Place on wax paper to cool.  Once done dipping bottoms, melt last 1/2 cup chocolate and place into a zip lock bag.  Snip a tiny hole in one of the bottom corners of the bag and drizzle chocolate over tops of cookies.  Let cool over night, store in air tight container.


Box em up and send them to people you love!!  Try not to eat too many.  I'm thinking up a way to hybrid this into ice cream.  How yummy would that be?  Enjoy!

Labels